
Last Updated: November 8, 2026
Quick Summary
Professional guidance for complex restoration projects starts with a thorough site assessment that records existing conditions and sets written restoration goals. You then define an interior design scope of work, secure heritage approvals before any physical work begins, and build a specialist team with clearly defined responsibilities. Change control, period-appropriate materials and a room-by-room handover check keep the project on track.
- Survey room by room, photograph everything and record ceiling heights, cornice profiles, skirtings and architraves.
- Write the scope of work as a project brief; anything not in the brief is a variation needing approval.
- Confirm heritage listing status and consent authority before booking trades, and build approval timeframes into the program.
- Engage the conservation architect at assessment and specialist trades at documentation stage.
- Budget a contingency for hidden conditions and log every change with its cost and time impact.
Table of Contents
- Step 1: Assess Existing Conditions and Set Restoration Goals
- Step 2: Define the Interior Design Project Scope of Work
- Step 3: Secure Heritage Renovation Approvals Before Work Starts
- Step 4: Plan for Preserving Original Features in Heritage Homes
- Step 5: Build a Specialist Team and Coordinate Responsibilities
- Step 6: Run Restoration Project Management with Change Control
- Step 7: Select Materials, Finishes and Period Fittings
- Step 8: Quality Checks, Styling and Handover
- Frequently Asked Questions
Step 1: Assess Existing Conditions and Set Restoration Goals
Professional guidance for complex restoration projects for interior design starts with a single, honest question: what are you actually working with? At Restoration Station, we have spent 35 years helping owners answer it.
A thorough site assessment is the foundation of every sound restoration project. It records existing conditions, separates what can be saved from what must be replaced, and sets realistic restoration goals against the heritage significance of the building.
Start with a room-by-room survey. Photograph everything. Measure ceiling heights, cornice profiles, skirtings and architraves. Note cracks, damp patches and sagging plaster.
Then set your goals in writing:
- What must be preserved at all costs
- What can be sensitively upgraded
- What is already beyond saving
Watch out: skipping this step is a common mistake. If you are weighing up whether to bring in professional help, Is Professional Restoration Advice Worth It? A 2026 Guide sets out what expert input actually changes.
Step 2: Define the Interior Design Project Scope of Work
An interior design project scope of work is the written document that defines exactly what will be done, by whom, to what standard, and in what order. It is the single most useful tool for keeping a heritage project on track.
Scope creep kills restoration budgets. Vague briefs let small "while we're in there" additions pile up until the original plan is unrecognisable.
Your scope of work should cover:
- Rooms included and rooms excluded
- Conservation versus replacement for each element
- Trades required and sequencing
- Deliverables at each stage
- Sign-off points before the next stage begins
Write it as a project brief the whole team can read. If a task is not in the brief, it is a variation, and variations need approval.
Step 3: Secure Heritage Renovation Approvals Before Work Starts
Heritage renovation approvals must be in place before any physical work begins. Getting this wrong can mean stop-work orders, fines, or orders to reverse work already completed, and on a significant site, reversal can destroy the very fabric the project was meant to protect.
Heritage controls vary by state, territory and local council, and the pathway depends on what statutory listing applies and what planning instrument governs the site. Confirm the requirements with your local council and the relevant state heritage authority.
Work through the approval pathway in this order:
- Confirm listing status. Check the state heritage register, the local council's heritage list or schedule, and any conservation area mapping. Request the heritage inventory sheet for the property, it records the cited significance and the specific elements protected.
- Identify the consent authority. Confirm with your local council and state heritage authority which approval applies to your works.
- Commission the supporting documents. Many councils require a statement of heritage impact, and significant sites often need a conservation management plan that sets out significance, policies and the acceptable scope of change.
- Lodge before booking trades. Approval timeframes vary by council and application type, and conditions may be imposed. Build the approval period into the program rather than assuming it will run in parallel with design.
- Translate conditions into the scope of work. Approval conditions, protected elements, method statements, supervision requirements, archival recording, must be written into the scope and the trade briefs, not left in the approval file.
- Keep approved drawings and conditions on site. Anyone working on the building should be able to check what was approved before they touch a surface.
Watch out: the most common failure is treating heritage approval as a paperwork step after design is settled. Conditions can force changes to layout, services and finishes, so the approval pathway should shape the concept, not follow it.
Our guide to renovating heritage listed properties walks through the approval process in more detail.
Step 4: Plan for Preserving Original Features in Heritage Homes
Preserving original features in heritage homes is where restoration and interior design meet. Original cornices, ceiling roses, fireplaces, joinery and hardware carry the character that makes a period home worth restoring.
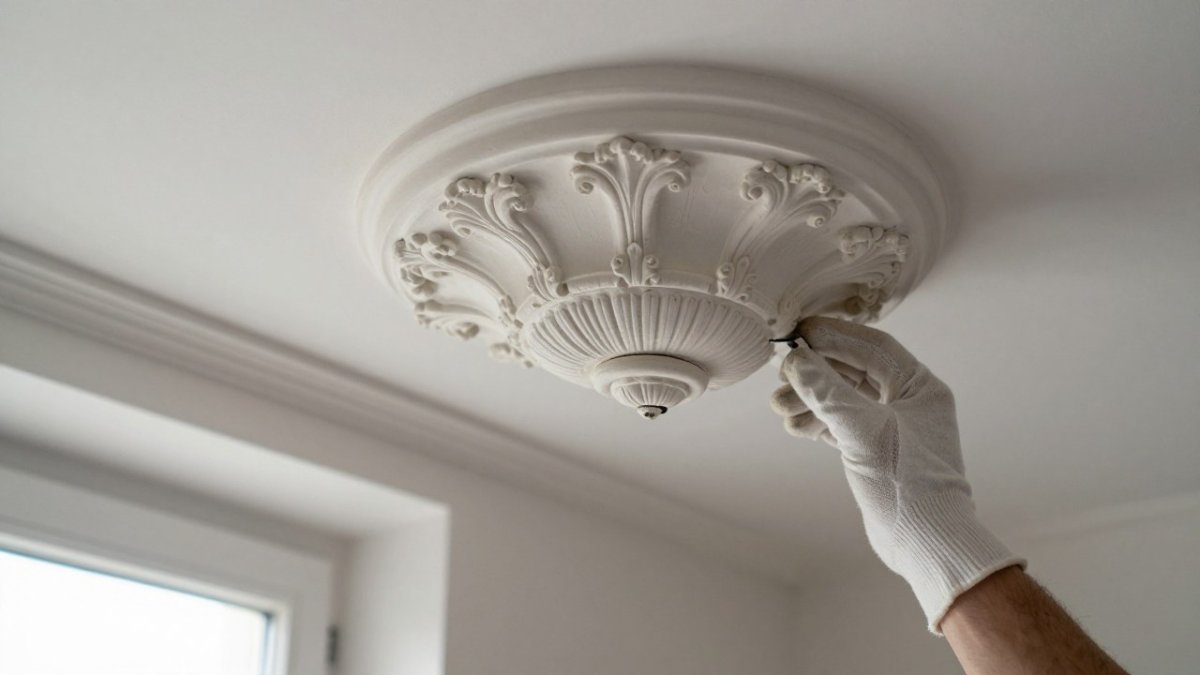
Survey each feature and record its condition. Plaster cornices can often be repaired rather than replaced. Original timber joinery can be stripped and repaired. Cast iron fireplaces can be restored to working order.
Where a feature is missing entirely, match it to the period of the house rather than to personal taste. A Federation home should not receive Victorian fittings.
Step 5: Build a Specialist Team and Coordinate Responsibilities
Restoration projects need specialists, not generalists. A heritage builder, a plasterer experienced with lime and ornamental work, an electrician comfortable with older wiring, and an interior designer who understands period detailing all play different roles, and the project only holds together when those roles are defined before work starts. With those roles established, Aurina can help clarify how personal design choices fit within the practical and historical constraints of the restoration.
The practical question is not who to hire but when to bring each specialist in and what they are accountable for. A common pattern is to engage the conservation-minded professionals during assessment and design, and the trades during documentation and construction.
Conservation architect or heritage consultant. Engaged at assessment. Accountable for significance assessment, the conservation management plan or statement of heritage impact, and conservation policy that guides what is preserved, repaired or replaced. Should review design before approval lodgement.
Structural engineer. Engaged once the assessment identifies structural questions, sagging floors, cracked masonry, roof framing, or proposed openings. Accountable for structural adequacy, remedial methodology and any temporary works needed during construction.
Building surveyor or certifier. Engaged early enough to confirm the approval pathway and the compliance requirements that will apply to the works. Accountable for statutory certification and for flagging where restoration methods intersect with building code requirements.
Interior designer. Accountable for translating the conservation policy into a liveable interior, space planning, finishes, fittings and detailing that respect significant fabric while meeting the client's brief.
Heritage builder and specialist trades. Engaged at documentation stage so their method knowledge informs the scope. Accountable for executing conservation methods, lime plastering, joinery repair, traditional finishes, and for reporting conditions found once surfaces are opened.
Define responsibilities clearly in writing:
- Who orders materials and who approves substitutions
- Who holds the approvals and the conditions attached to them
- Who signs off each stage and against what standard
- Who manages the budget and authorises variations
- Who is the single point of contact for the owner
A responsibility matrix, one row per decision, one column per role, prevents the most common coordination failure on restoration projects: two specialists assuming the other has checked a concealed condition. For broader expert advice on assembling and coordinating a restoration team, see expert advice for heritage home restoration.
Here is when each specialist joins the project and what they are accountable for.
| Role | When engaged | Accountable for |
|---|---|---|
| Conservation architect or heritage consultant | At assessment | Significance assessment, conservation management plan or statement of heritage impact |
| Structural engineer | Once assessment identifies structural questions | Structural adequacy, remedial methodology, temporary works |
| Building surveyor or certifier | Early enough to confirm approval pathway | Statutory certification and building code requirements |
| Interior designer | Design stage | Translating conservation policy into a liveable interior |
| Heritage builder and specialist trades | At documentation stage | Executing conservation methods and reporting opened conditions |
Step 6: Run Restoration Project Management with Change Control
Restoration project management is the discipline of controlling time, cost and quality while the building throws surprises at you. Hidden conditions are the norm, not the exception.
Rotten framing behind plaster. Failed wiring inside walls. A fireplace flue that has been bricked up for decades. Budget a contingency and hold it.
Change control works like this:
- Every change gets written down
- Every change gets a cost and a time impact
- No change proceeds without owner approval
- Approved changes update the scope of work
A simple change register, updated weekly, prevents most disputes.
Step 7: Select Materials, Finishes and Period Fittings
Materials and finishes make or break the authenticity of a restoration. The wrong ceiling rose or a modern-looking door handle undoes months of careful work.
Match fittings to the era of the house. Federation homes suit particular handle styles and light fittings. Colonial homes suit others, and Restoration Station's range covers traditional fixtures for Colonial and Federation-style properties. Our expert team can help you identify what is period-appropriate.
When sourcing, look for:
- Correct period profile and proportion
- Consistent finish across multiple orders
- Materials suited to the building's conditions
- Reliable supply for replacements later
For guidance on sourcing, read how to find reliable suppliers for heritage building materials.
Step 8: Quality Checks, Styling and Handover
Quality control at handover protects the investment you have made. Check work against the scope of work, room by room, before final payment.
Your handover checklist:
- Plasterwork smooth, straight and correctly profiled
- All hardware fitted, aligned and operating smoothly
- Paint finishes consistent across rooms
- Fireplaces and light fittings tested and certified
- Photographic record of completed work filed
- Maintenance schedule provided
Styling comes last. Keep furniture and soft furnishings sympathetic to the period, and let the restored features lead. For projects with multiple rooms, sourcing consistent heritage fixtures keeps the finish coherent from front door to back.
Complex restoration projects reward preparation over speed. At Restoration Station, we supply period lighting, cast iron fireplaces and architectural hardware for heritage, Colonial and Federation homes, backed by 35 years of experience and expert advice on what suits your property. Our range covers the fittings that finish a restoration properly, and our team can help you match them to your home's era. Get started with Restoration Station and give your restoration the fittings it deserves.
Frequently Asked Questions
How do you plan a complex heritage home restoration?
Start with a condition assessment that documents existing fabric, then write a scope of work that separates essential repairs from cosmetic work. Confirm heritage approvals before any alteration, and build a contingency into the program for hidden conditions. A restoration project management plan should set change-control rules, a construction sequence and named responsibilities for the designer, builder and heritage specialist. This order stops surprises from derailing the budget.
What approvals may be needed before altering a heritage-listed home?
Heritage renovation approvals vary by state, territory and local council. Heritage-listed properties often require approval before external or structural changes, and approval requirements vary by property. Check with your local council and the state heritage authority early, and confirm whether a heritage impact statement or conservation management plan is required. Getting advice before you brief trades avoids redesigns later.
How can you preserve original features during a renovation?
Document every original element before work begins: photograph, measure and label fixtures, cornices, architraves and joinery. Remove and store items that must come out, and specify like-for-like repairs rather than replacement. Preserving original features in heritage homes depends on matching materials and profiles, so source period-appropriate fittings and brief trades on protection and sequencing. Keep a photographic record at each stage for approvals and future reference.
How do you coordinate designers, builders and heritage specialists?
Set a single point of contact for the project and a shared program that shows who decides what and when. Hold short weekly coordination meetings covering site progress, upcoming approvals and any variation requests. Put decisions in writing, with drawings and specifications issued to the builder before work starts. A clear scope of work and change-control process keeps the interior designer, heritage consultant and contractor aligned through construction sequencing.